Directions for Paper Snowman:
-
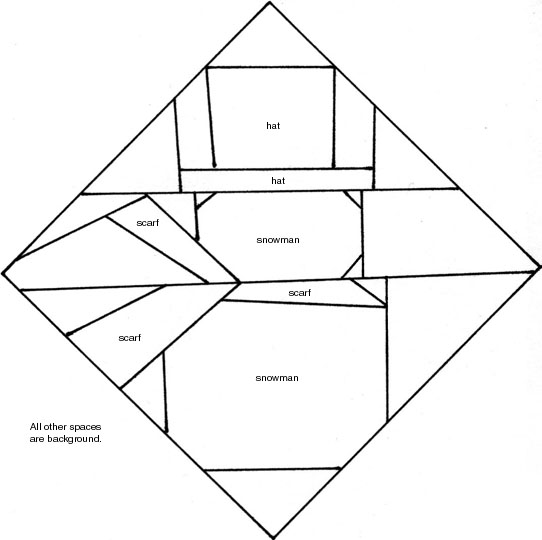
Cut out the pattern for a paper snowman, cutting all the
pieces apart. If the pattern is going to be used more than once or
by young children, you may want to glue it onto stiff paper first, so the
pieces will be easier to draw around. You may also want to eliminate the
tiny corners on the head and scarf. The snowman will have a more square
appearance, but will still work.
-
Place each shape on a piece of appropriately colored paper.
Trace around the shape and cut it out.
-
Arrange all the colored pieces on a sheet of paper and glue
them in place. For young children you may want to copy the
pattern so each child can use one for a base. They can then match
each shape to its place and glue it down.
Framing Your Paper Snowman:
An easy and fun way to frame your Snowman is to cut-out
20 one inch squares and paste them around the borders. You could
make a fancier frame by cutting the squares in half to make triangles and
then mixing them so each square is made of two triangles of different colors
or patterns. Or you could simply paste your snowman onto another
piece of colored paper. Another possibility is to make several paper
designs and paste them together on a larger sheet of paper to make a paper
"quilt". Have fun! |